Building your own robot can be a fun and engaging way to learn about many different engineering principles. The purpose of this webpage is to provide you will some of the resources that you need to build, wire, and program your robot.
|
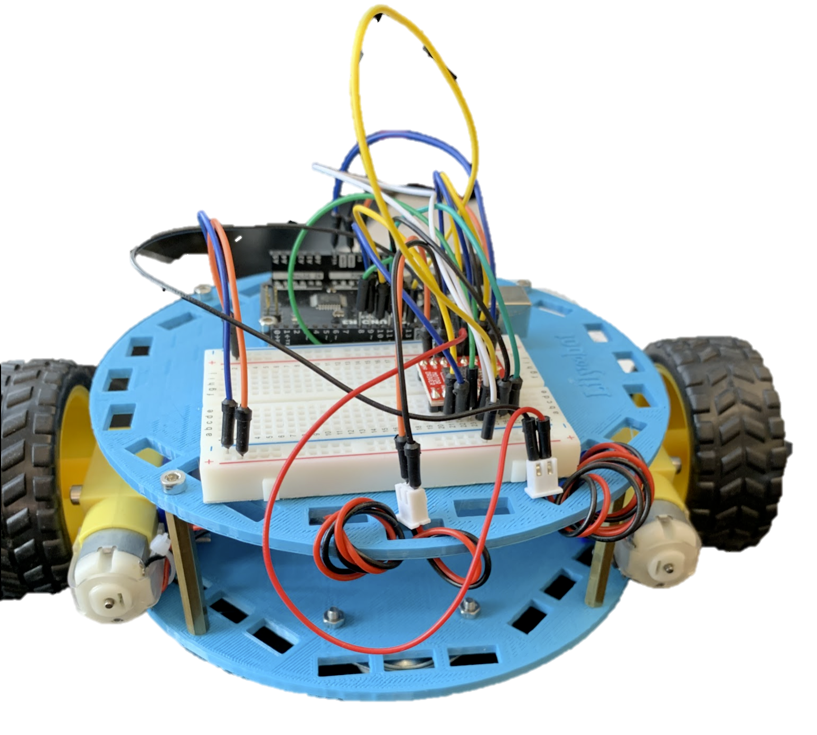
To help make your robot build easier, we will be using the Lilybot open source design from Dr. Carlotta Berry at Rose Hulman Universtiy.
You can find lots of resources directly from Dr. Berry's Hackster website. and you can also find CAD files on her gitHub website |
BUILD
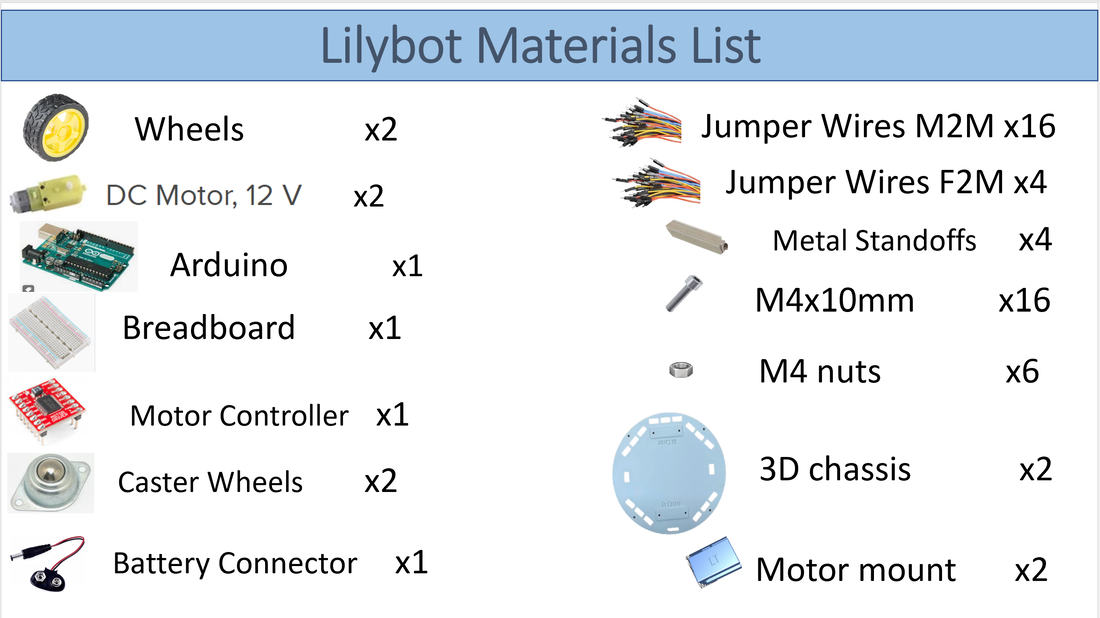
Start by gathering the materials you will need to build your base robot. You can add sensors and LED lights once you get your base robot moving!
Use this video to help you put your base robot together
WIRE
Before you start wiring your robot, you might want to learn a little bit about breadboards and how to create a circuit. Consider watching the video below.
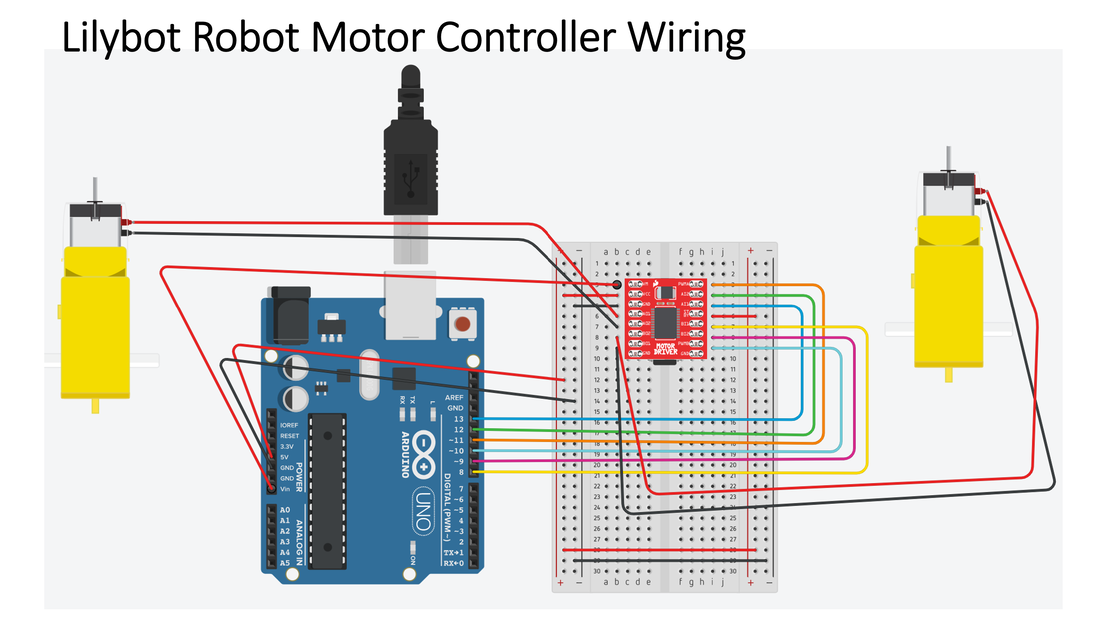
When you are ready, you can complete your base robot by wiring the motor controller to the Arduino UNO board.
PROGRAM
Once you have confirmed that your robot is built and wired correctly, you are ready to complete some base code for your robot using the Arduino software.
Below is a link to help you start creating code
If you want have more experience with block coding, you might try creating your code with edukits
If you want to start with the base code and use it to add more movement functions, use the Arduino code below.
| base_code_udm.ino |
Now that you have some basic code for your robot, let's try and do some more advanced coding to get your robot doing some fancy moves.
Below are 2 videos that will help you add more movement functions to your robot and add parameters to your function so you can vary time or speed for your movement.
Below are 2 videos that will help you add more movement functions to your robot and add parameters to your function so you can vary time or speed for your movement.
SENSORS
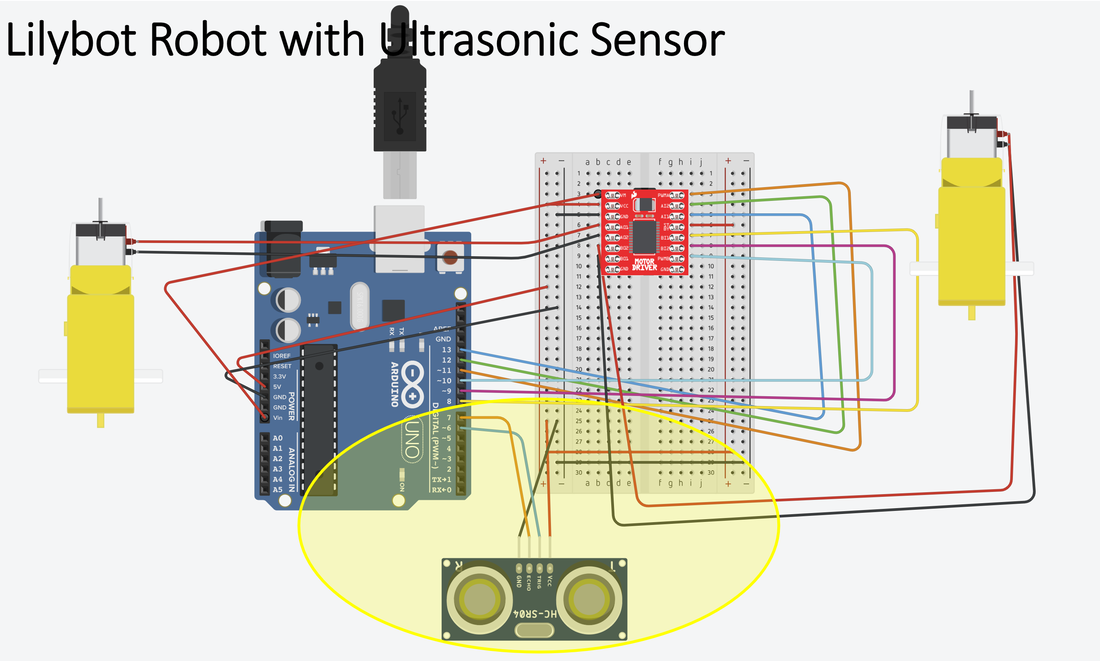
Now that you have your base robot working, you should be ready to try adding some sensors. Below is the diagram for adding the wires for an ultrasonic sensor, and the code that will help you test this on your robot.
If you got all the way through the building, wiring, programming the base code, and adding the ultrasonic sensor - you are ready for the last part of this tutorial. You are ready for the encoder.
To start you will need to do 2 things:
1) add the Sparkfun encoder to the front shaft of one of your motors and then wire the red to power, the black to ground, and the white to the A5 Arduino pin.
2.) Include the library below into your Arudino software so you can utilize their encoder programs.
To start you will need to do 2 things:
1) add the Sparkfun encoder to the front shaft of one of your motors and then wire the red to power, the black to ground, and the white to the A5 Arduino pin.
2.) Include the library below into your Arudino software so you can utilize their encoder programs.
| sparkfun_redbot_library-2.1.1.zip |
Once you add your Encoder to your robot, and add the Library to your Arduino program, you are ready to code. Use the video below to help you with the coding.
